
Magnetic Tripod Mount Setup for the ZSA Moonlander
How I built my own magnetic tripod mount kit for the ZSA Moonlander split keyboard


I’ve had my ZSA Moonlander for a couple of years now and I’m loving it still. I really enjoy the customizability of it and being able to program it (so easily) to do exactly what I want.
However, one thing I have been wanting to do is be able to mount my Moonlander on a C-Clamp on my desk so I can tent it exactly at the right angle for my wrists. ZSA sells a tripod mount kit for the Moonlander. But I don’t really like the idea of having to screw and unscrew each half onto the clamps.
I was looking at the tripod kit ZSA sells for the Voyager and thought the use of magnets for it was brilliant. Sadly, the Moonlander does not share the same metal backing plate as the Voyager. At this point, the gears in my head started spinning. I thought, what if I could add a metal plate to the Moonlander so I could use strong magnets to attach the keyboard to the clamps?
I started doing some research to see if anyone else had done this. And while I found a couple of posts claiming they had, there weren’t enough detail for me to do the same. So I decided to come up with my own plan for this and hopefully make it simple enough so I don’t need to spend too much time or buy a bunch of tools to make it happen. Here’s how it went.
The Plan
My plan was to essentially screw in a metal plate to the back of the Moonlander where the 4 screw holes are. Then, I could find a magnet with a 1/4-20 female thread (or put together my own, though I really didn’t want to go that far) that I could screw onto the clamps. If the magnets have a strong enough pull-force, I should theoretically be able to just snap the keyboard onto the magnet and it should be fairly secure.
Why Not Just Use Magnets with an Adhesive Back?
Good question. This would totally work. The idea would be to stick some magnets to the back of the keyboard halves using some kind of adhesive. But I didn’t want to use an adhesive to do this because I don’t know how well it would hold up to the pulling force of strong magnets. Additionally, I didn’t the adhesive to do any damage or leave residue on the keyboard.
But if you don’t care about that, ignore the metal plate stuff and just get yourself magnets with an adhesive back.
Finding the Supplies
I tried finding appropriately sized metal plates and strong magnets, with 1/4-20 female thread if possible, at local hardware stores but none of them really carried what I was looking for. So I reluctantly turned to the internet and, fairly quickly, found the supplies I needed.
Metal Plates
I wanted to metal plates made of stainless steel and to be thick enough that the magnets would attach fairly securely to them but thin enough that drilling holes into it wouldn’t be a chore. I only really have a handheld drill with some drill bits that I’d want to use to do this.
But first, we need to get the measurements for the screw holes and the distance between them. We also need to determine what the minimum and maximum size the board can accommodate.
The screw holes are arranged in a square shape, with each side measuring approximately 19mm (from the center of one hole to the other). Based on this, I could either get a square or rectangle shaped steel plate that is at least 30mm long and 30mm wide. The width could be longer, say 50mm to 70mm - more on this later. The other option was to get circular metal plates measuring at least 40mm in diameter.
After debating with myself about the shape, I settled on the circular steel plates because I thought they would look nicer on the keyboard than a square or rectangular plate. Specifically, these ones (none of these are affiliate links, btw).
They are 42mm in diameter and have a thickness of 1.8mm, which should be sufficient to create enough magnetic pull force to secure the keyboard to the magnet on the clamps.
The keen-eyed folks reading this will know right away that this won’t work. And you’d be right. But I’m getting ahead of myself so let’s hold off on that a bit.
Screws
The four screw holes in the Moonlander for the tripod mount are about 5mm deep. Taking the thickness of the metal plate into consideration, I’d need a screw that’s roughly 7mm long. But 5mm or 6mm screws will go deep enough too. The screw size they take is M2.6, according to the tripod mount kit page on the ZSA website. I could not find M2.6 size screws anywhere so I thought I’d try M2.5 size. These are usually the ones used in electronics.
I actually had a couple of old hard drives lying around that had these exact screws with a flat top. They were only 5mm long but good enough for my needs.
But for those out there that need to buy some, Look for M2.5 screws that are at least 6mm in length.
Magnetic tripod mount
We also need a tripod ballhead that can screw into the c clamps and a magnetic mount with a 1/4-20 size female thread. The idea is to screw the magnetic mount to the ball head and then the keyboard should just magnetically attach to the mount.
Here is what I ended up getting. A two-pack of magnetic tripod mount.
And a set of tripod ballheads.
Attaching the Metal Plates to the Keyboard
Now comes to fun part - drilling holes into the metal plates we got so we can screw them into each half of the keyboard.
To do this, I got some tracing paper (ok I lied, it’s parchment paper meant for cooking, but it works) and made an outline of the steel plates on it. Then, I positioned the paper over the screw holes on the keyboard and marked the positions of the holes on the tracing paper.
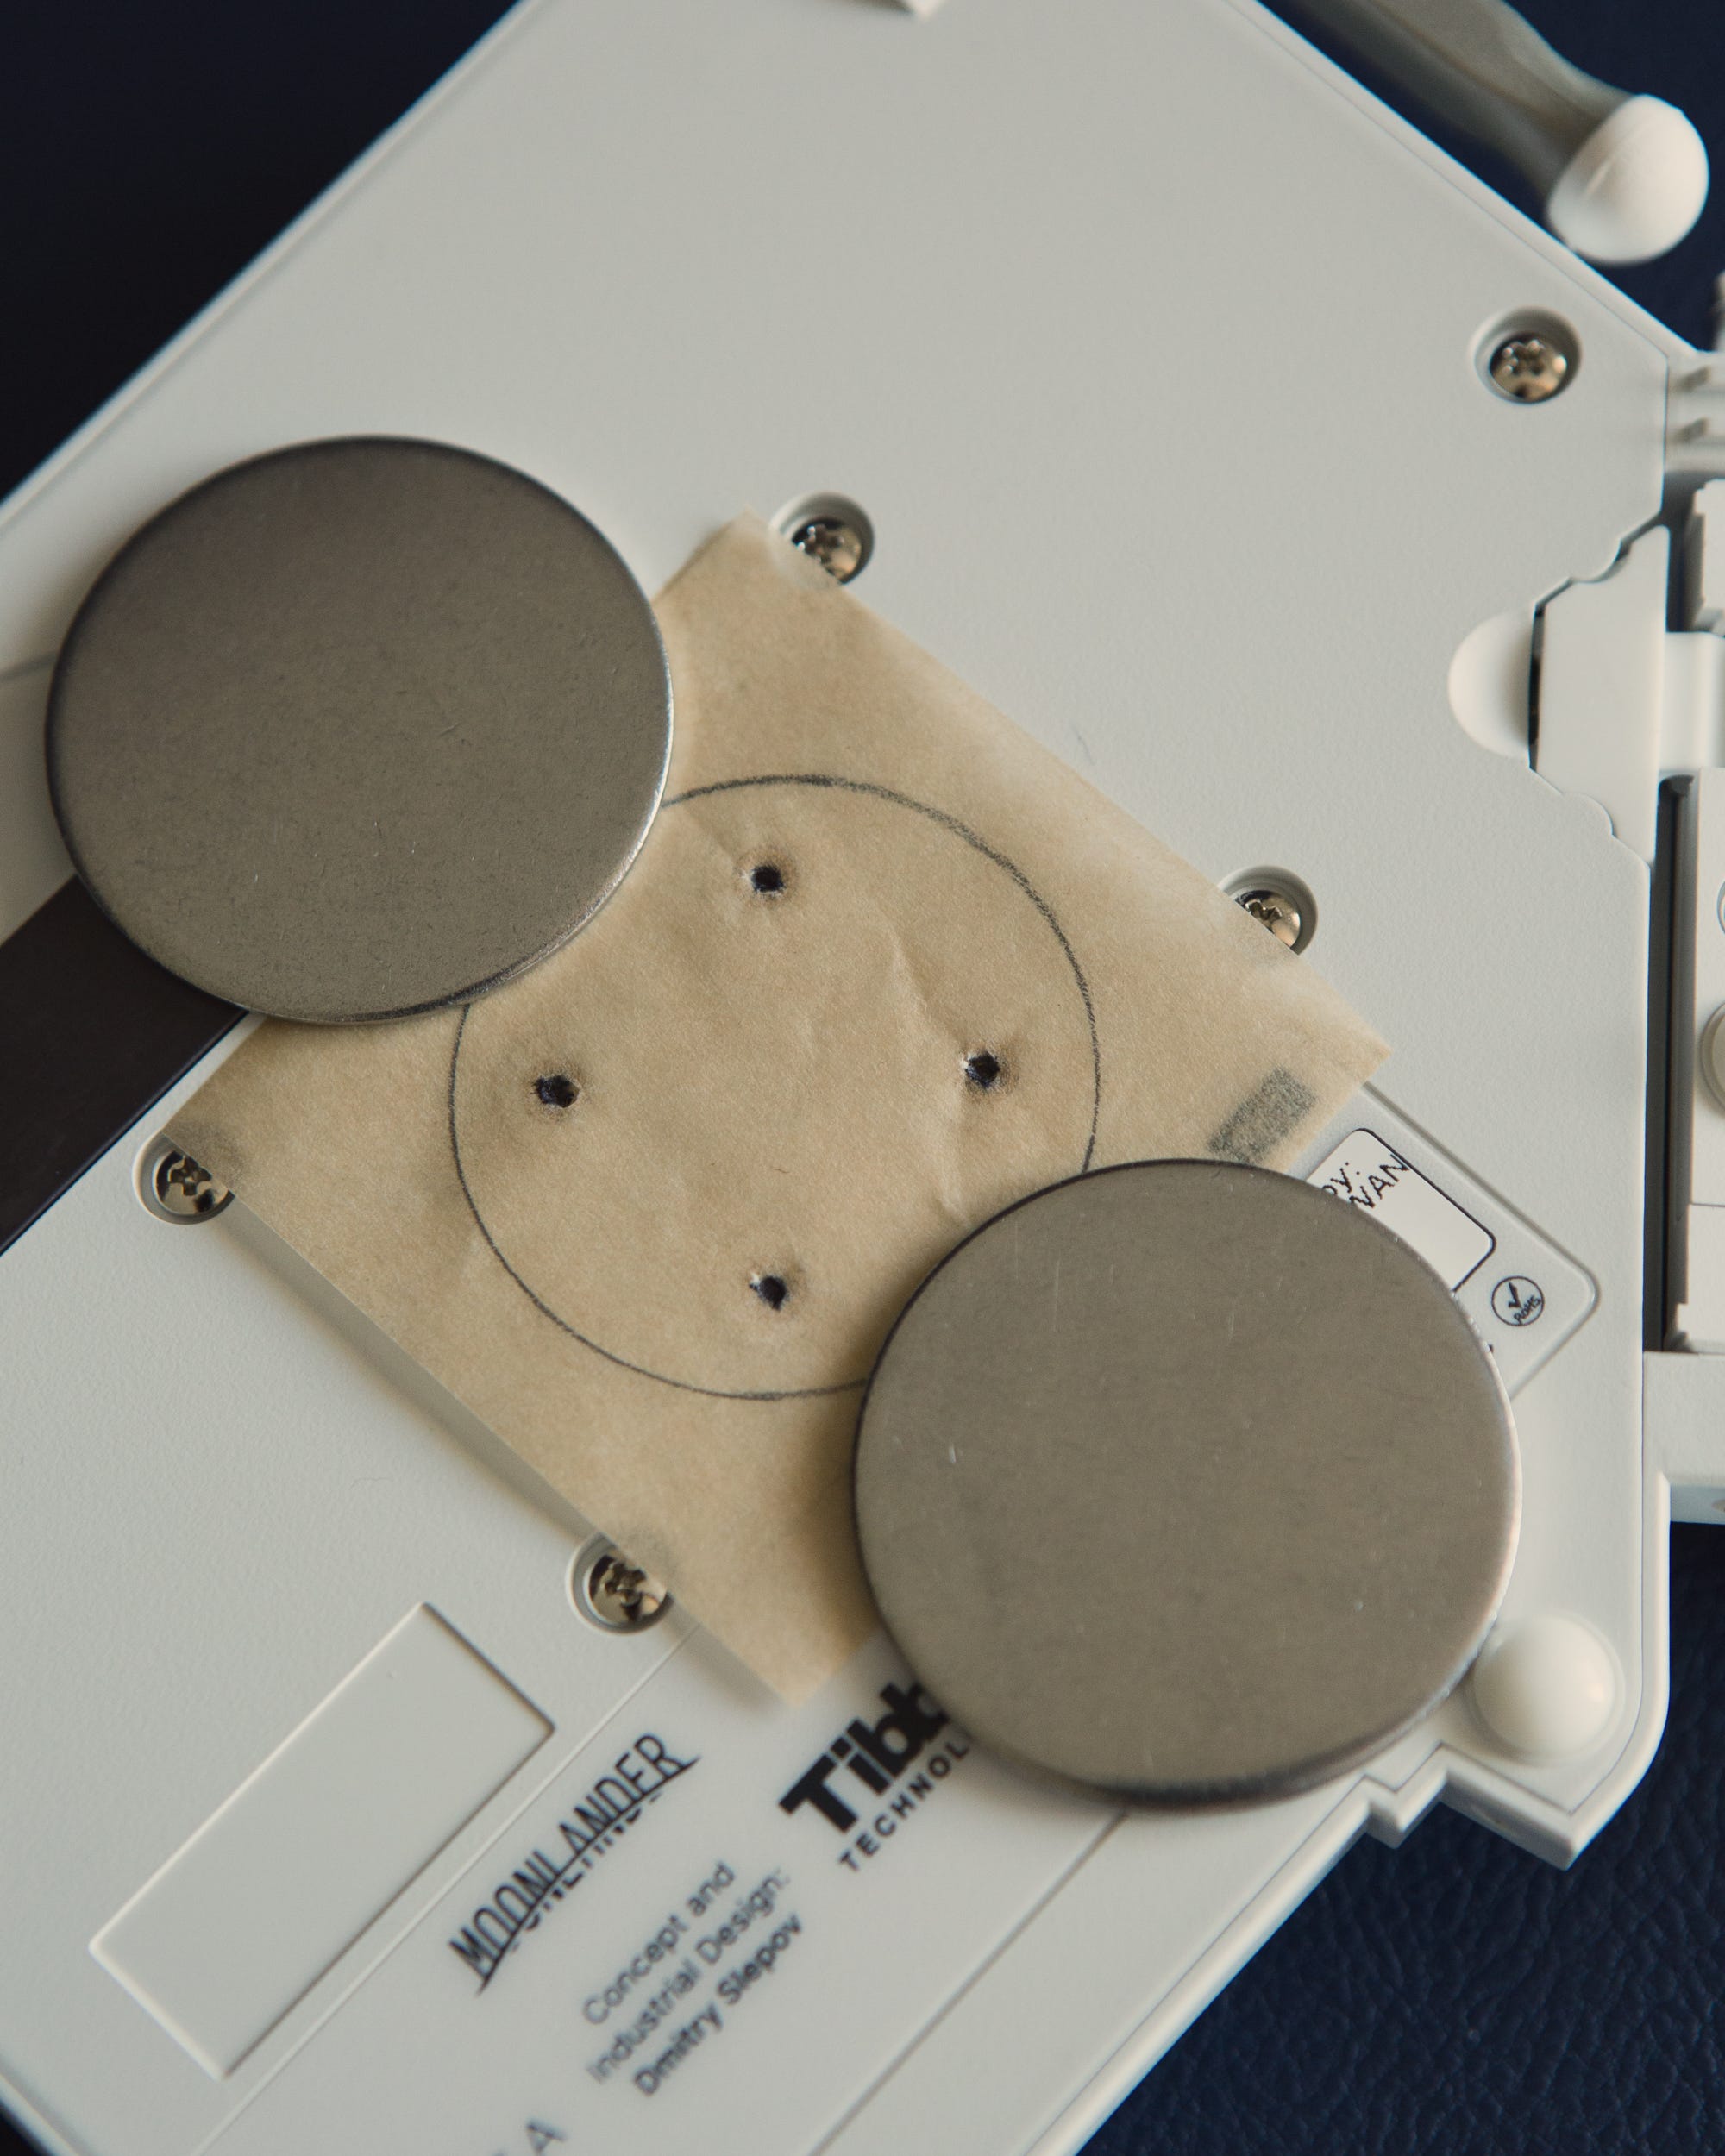
Then, I punched holes through those marks on the paper with a pencil, positioned the paper to line up with the metal plate, and made marks on the metal plate through the holes in the paper using a sharpie. Here is the end result:
Now, we can use a drill bit to drill holes where we made the marks on the steel plates.
A couple of notes on this:
Wear protective gear (glasses, mask, gloves) while you’re drilling the holes. Little bits of metal may fly around you while you’re doing this so it’s very important to wear protective gear.
Make sure to use a clamp to secure the metal plate onto a piece of wood so that while you’re drilling the holes, it doesn’t fly off while you’re drilling the holes.
If you have a center punch, use it to make a small dent where we marked the holes to be drilled. This will help make sure the drill bit doesn’t run away when you’re trying to drill the holes.
Use a 1/8” drill bit. This will create a hole big enough for our screws to go through but not so big that the screwhead goes through it too.
Use the drill on maximum power.
If it helps, practice this on a couple of the extra steel plates if you have any so you know what to expect.
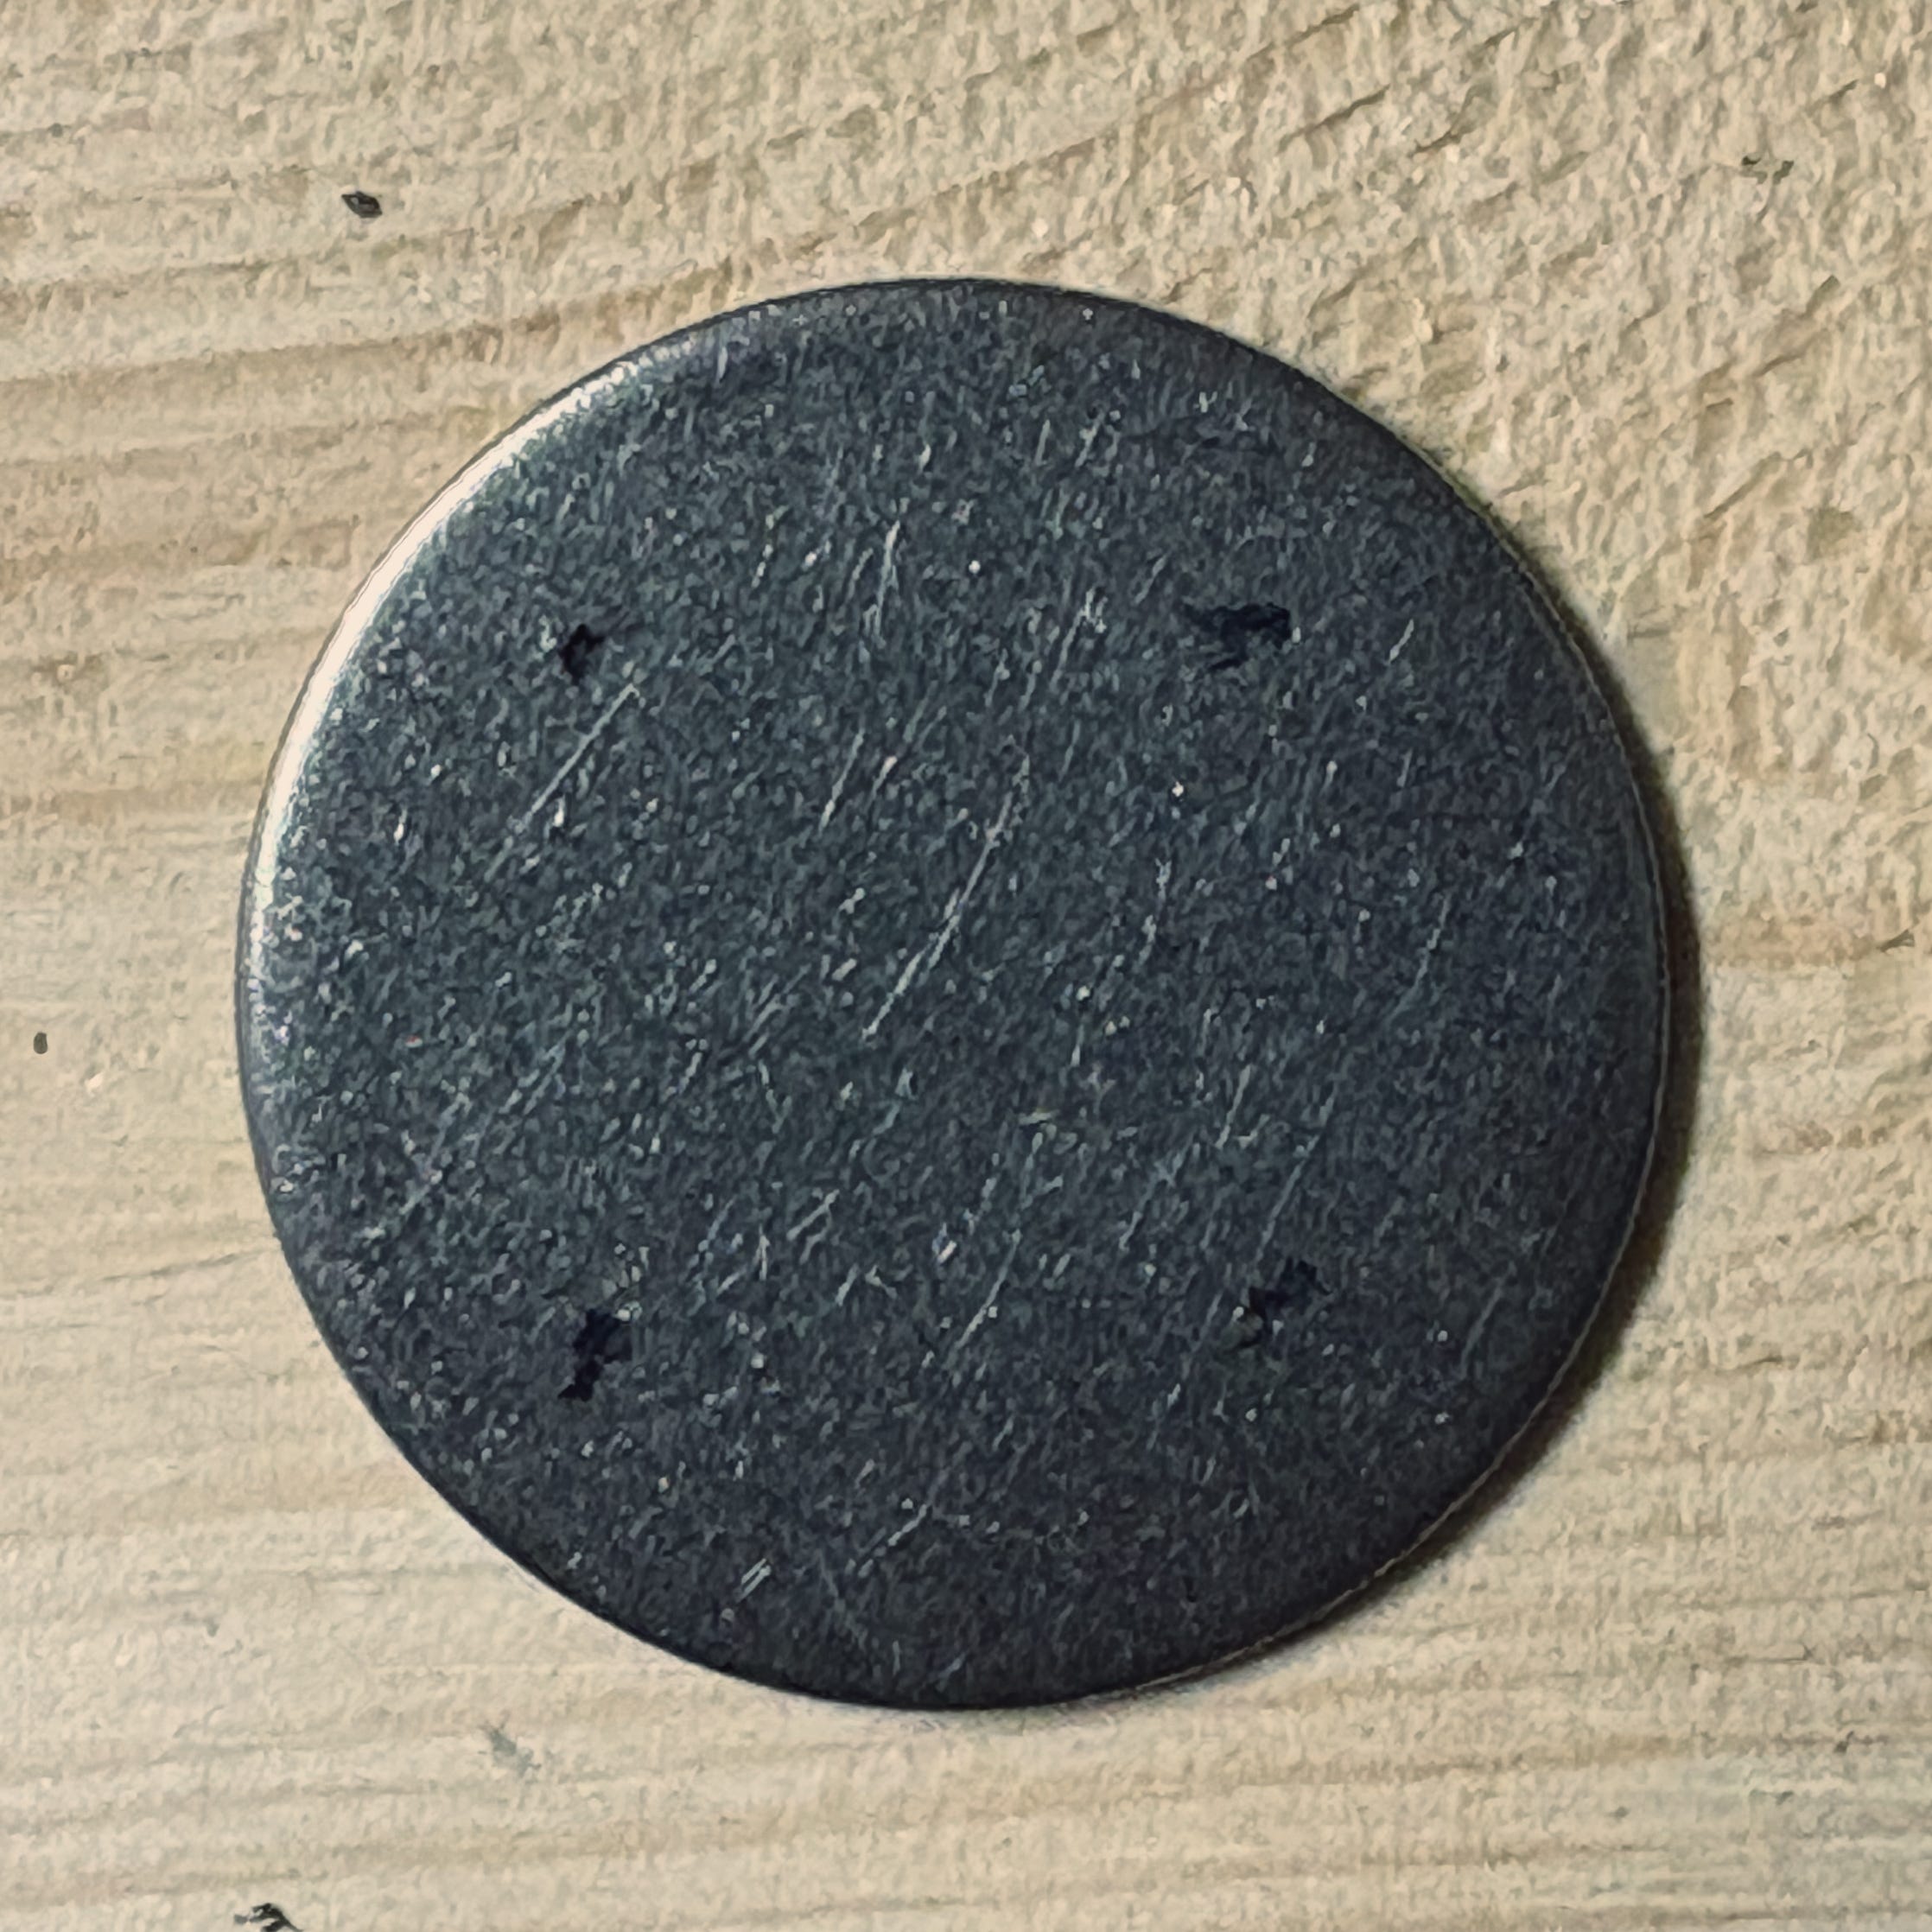
I also recommend sanding the holes down because their edges will be quite sharp. We don’t want to damage our hands handling them or the back of our precious keyboard. I used my orbital sander with a 220 grit sandpaper to sand the metal plates after drilling the holes. Here is the end result with the metal plate screwed into the back of the keyboard.

Putting Everything Together
Now, we will screw our magnetic mounts to the ballheads, then screw the ballheads to the c-clamps. Then we can set up the clamp on the desk.
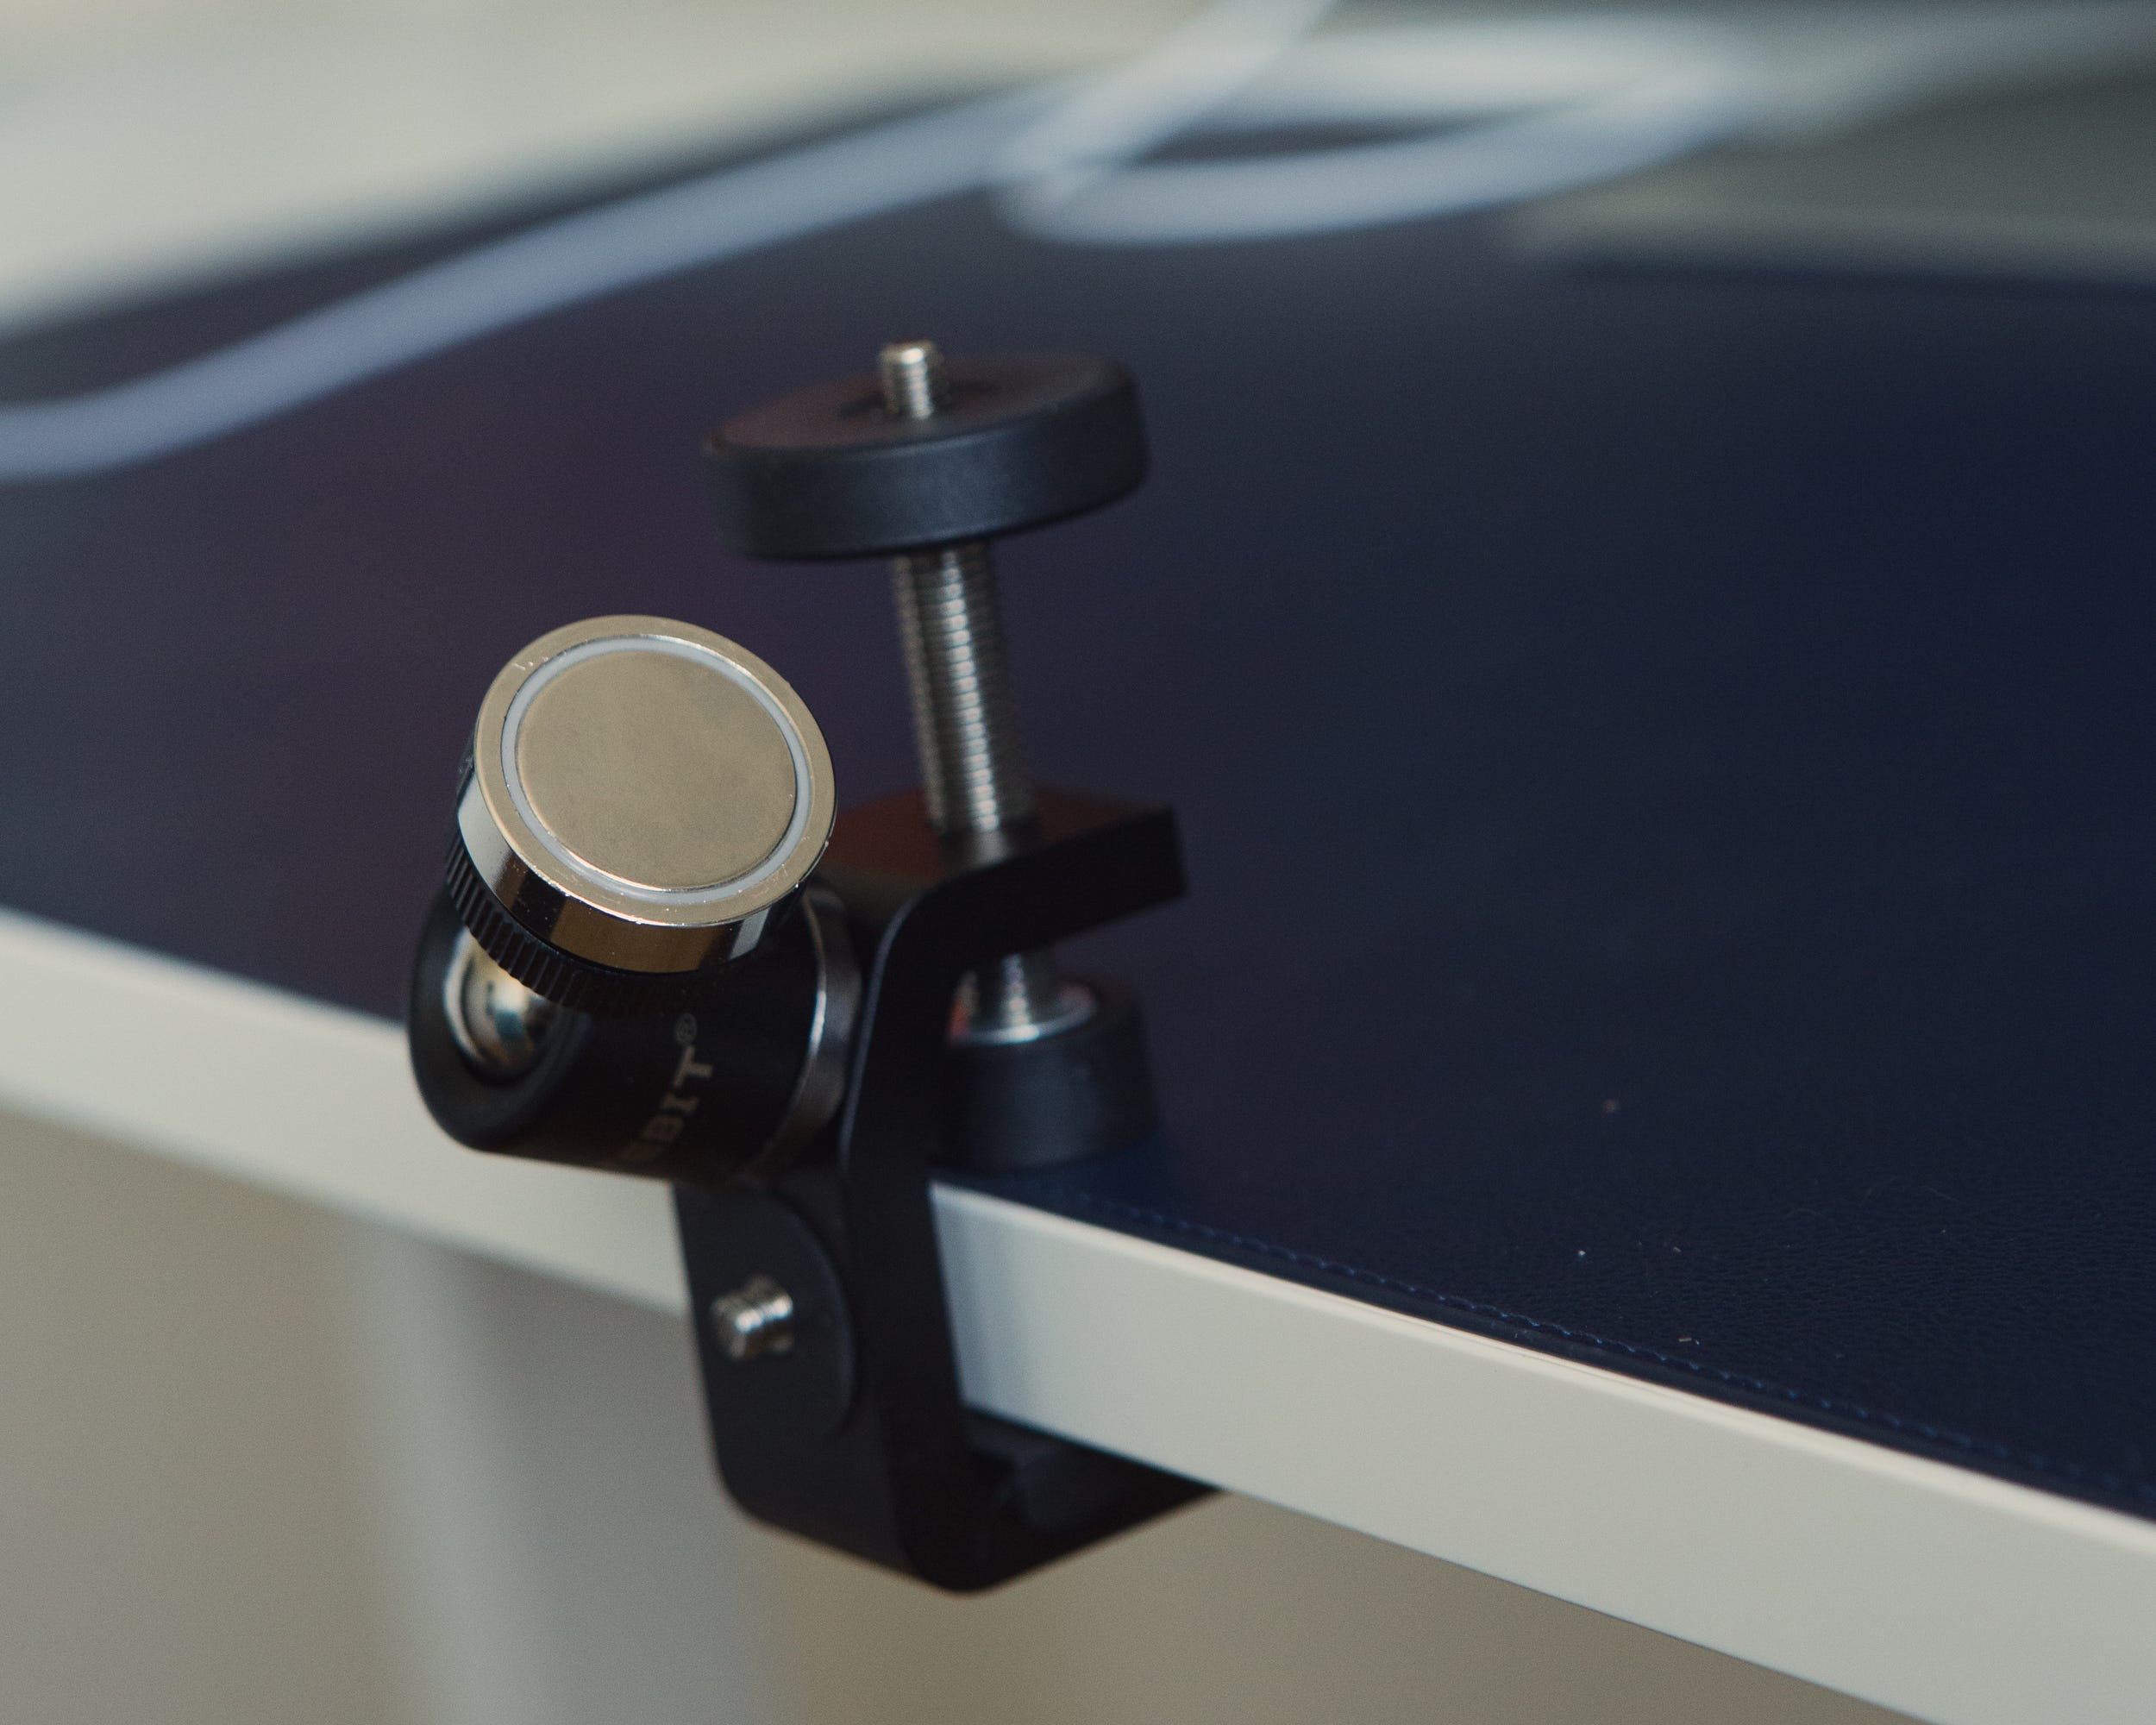
The final step is to just put the keyboard onto the magnetic mount and it should all just work.....oh wait. Remember when I mentioned earlier that some of you might have noticed a problem? Yeah, about that...
There’s Different Types of Steel
Apparently, when I ordered the steel plates, I didn’t know that some grades of stainless steel are ferritic (meaning they work with magnets) while others are not.
So the plates I got were grade 304, which apparently is not ferritic. FML. I didn’t even bother checking.
What I needed was grade 409 or 430 stainless steel plates.
Sigh.
But there’s still hope for me.
How I Still Made It Work
Ok, so it turned out, when you get really strong magnets, you don’t need a ton of ferritic metal surface to get a strong magnetic pull to hold your keyboard. Apparently the screws I took from my old hard drives were made of the correct grade of steel and actually provided a fairly strong connection to the magnet that I didn’t need to start over from scratch.
Thank God.
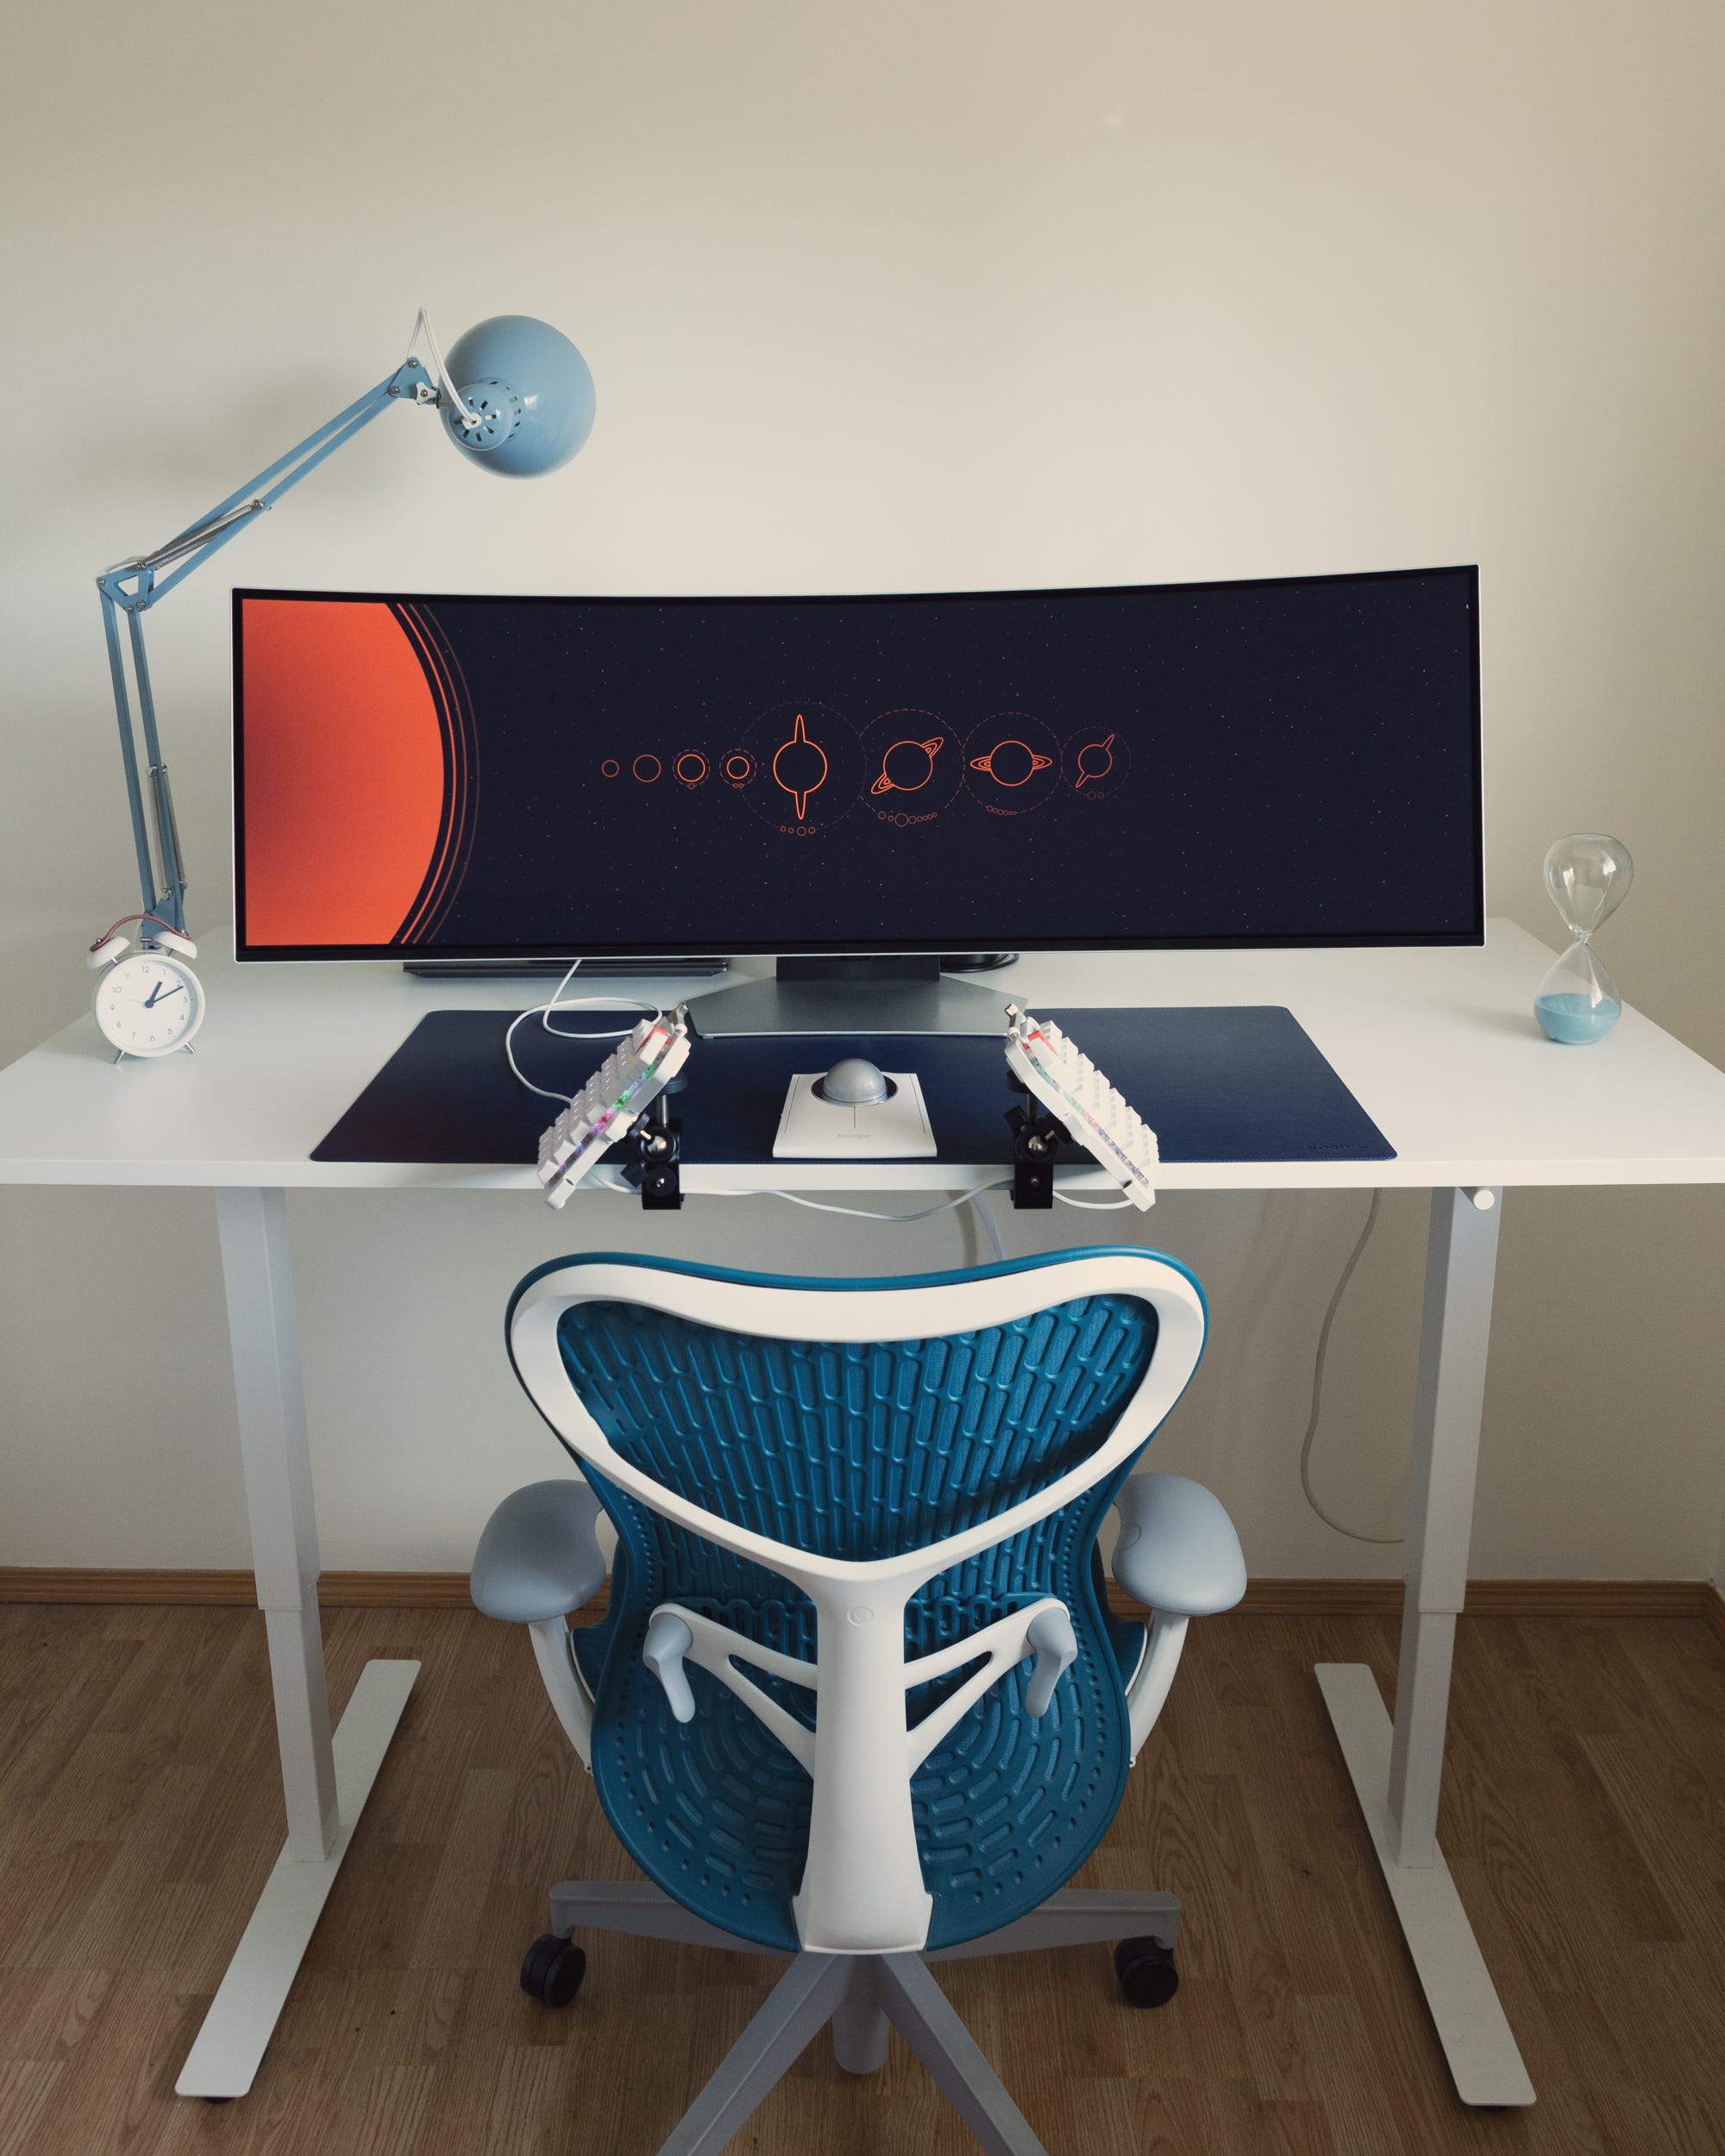
Here is the final setup with the Moonlander mounted magnetically.
Things I Would Do Differently
Different C-Clamps
The clamp-style tripods I have are too close to my desk to allow a wide range of mounting options for the keyboard. I made it work but if I had to do it all again, I would buy clamp-style tripods that have a protruding, adjustable arm so I could mount the keyboard a bit further away from the desk
A More Secure Magnetic Connection
It turns out that while the magnetic connection to my keyboard is strong and I’m not worried about the keyboard flying off the mount, it is relatively easy to rotate the keyboard on the magnetic mount. Now in a way, that’s nice because I don’t have to touch the mount to adjust the rotation. But it would be nice to have a way to make it so the keyboard doesn’t even rotate - similar to how the Voyager tripod mount kit is set up where the mount has little protrusions in the corners that align with the holes in the back of the keyboard to make it so it won’t rotate on the magnet itself. One idea would be to get screws that protrude a bit more, and then try to drill holes in the magnet itself to align with the screw heads. That would make it similar to the Voyager mounting kit. But I’m not sure how easy it is to drill holes in magnets without cracking them.
That being said. I can easily type on the keyboard without it having rotate on me. The rotation still requires you to actively push it in the appropriate direction for it to work. And when you’re typing, you’re not pushing the keyboard in such directions anyway. So the setup I have works perfectly fine and the keyboard feels very secure in the position it’s in.
Final Thoughts
Overall, I’m fairly happy with the setup considering that it was pretty DIY and I was doing it all based on my own plans. And it was a bit cheaper than getting the ZSA tripod mount kit, which isn’t magnetic.
But ZSA, if you’re listening, I would absolutely buy an official ZSA magnetic tripod mount kit for the Moonlander if you made one. Pretty please!